Sunday, October 7, 2012

Animal play room, great bonding room!

I love my cats. I got a beautiful 4 year old, solid white cat, Ophelia about 4 months ago,

                                                                         Ophelia

 and two days ago I rescued (from a drain pipe, in 40 degree rainy weather) a small, 4 month orange and white kitten I named OJ

                               (orange juice, but also OJ, lol, he is missing one of his white mittens)

  who I have already bonded deeply with, seeing as how he is just the sweetest thing, and loves to love. Needless to say, I forgot how DESTRUCTIVE kittens are! Romping in my floor length curtains, jumping on my bookshelves, clawing at my sofa, and being a terror in general. The problem is, is I dont want to DISCOURAGE play, its important to their development, but rather CONTROL the play, in a safe environment that cant be damaged. I dont have the money to go out and buy tons of special kitty condos and toys, so I built my own out of my storage room and stuff I had around the house! I also sprinkled cat nip on some items, to add to the enticement of playing there vs the rest of the house. This could be done as a play room for puppies, or really any kind of domesticated animal, just fill it with safe stuff that they will find irresistible, with lots of options should they get bored with playing with one item, to make a wonderful room they can get all their playing done and not destroy your house! With other animals, you could try hiding treats in various spots throughout the play area, until a habit of playing there has been established. This can be done in a storage room, or in an attached garage. If you do not have the space to dedicate a whole room to your animals, then you might want to simply incorporate some of these ideas into your living space, in corners or their feeding area, to encourage play on these items, and not on your furniture.

                                                                   CAT MOUNTAIN


All this is is some boxes of Christmas decorations, and two small tree boxes, with some towels on top for cushion, and an old couch cover stretched over the top.

 Seen here before I put the couch cover on it, I put the food bowls on there for perspective. Oj's already playing.
 It provides different levels for them to jump around on, and sleep on. The towels and soft couch cover add warmth and comfort. I use this as a food and water station, so I dont need to add catnip, this area has its own appeal. This would work well for any animal that likes to climb and jump, like a rabbit or ferret. With dogs, its going to depend on the individual dog, but they may enjoy you creating a 'dining room'. Find a small dining room table, or card table, thats tall enough for your dog to fit under comfortably, or a coffee table if you have a small dog. If its a puppy, take how big the dog will grow into account, unless you want to buy another one in the future. You can find these extremely cheap, usually about 20 bucks or less at yard sales and goodwills. You can also stack storage boxes or milk crates until its tall enough, and repeat about three ft over, to create a space. Drape a sheet, or table cloth over the top and down the sides, and line the inside floor of the area with towels or sheets to make it nice and comfy. Place the food and water bowls in there, so your dog can eat in comfort and warmth. (Yes, I know animals dont need 'special' places to eat such as mountains or dining rooms, but just like with humans, its the little things sometimes, plus, having food and water in the area gives them less reason to leave, and more to stay). If your dog is a messy eater and drinker, place the food and water on trays to reduce soiling the lining of the doggy dining room.


CAT CAVE


This is one of those stand alone bathroom cabinets you can buy from walmart for about 30 bucks that has a door that opens into a cabinet on the bottom, and a drawer on the top. (See two images up, where Im showing the mountain without its cover, thats before I put the bed sheet on the cat cave) I set that up against the wall. Then I took a long wooden rod (I already had one, a yardstick can be bought for about 3 bucks and attached easier) and wrapped tulle around it, gluing it on and tying it in knots at the end, leaving the ends dangling. I had to put nails in the top of the cabinet in front of the rod to hold it in place, the wrap a towel over it (to cushion the nails sticking out) and nail the towel to the wall on the top and bottom of the rod to keep it from flipping up. (once again, see above). With a yard stick, all you have to do is nail it to the top of the cabinet. I then draped a fitted sheet over the whole thing (door open) and attached it tightly around the legs, and around the back, then up over the bar, nailing it to the wall. (All this nailing to the wall means they cant tip it if they are hanging from the tulle, these things are cheap and pretty lightweight). Make sure the sheet is taught enough that it keeps the door open. You can remove the door of course, but I liked it, it added dimension and made it more 'cave like'. I cut a slit in the front for an entrance, and lined the inside with a towel and sprinkled it with catnip. This creates a space that the cats can hide in, and play predator, a favorite of the feline variety. (Watch your ankles walking past if your cat isnt accounted for!) This would work for most animals actually, though some would get no use from the dangling tulle and you could skip that part, and you may need to adjust the basic frame for a larger animal. (an old, second hand kitchen cabinet for example).


                                                             OBSERVATION TOWER


This one was simple. I put two large, Tupperware storage boxes in the bottom on a closet side by side. I draped a bathroom matt down the front of them, for a place to scratch. On top, facing sideways I placed another plastic storage box, and a small one next to it. Make sure the large one is heavy enough to hold the bathmat in place on the lower level. I set a cat bed on top of the large top box, and put a sheet in the bottom of it to make it super fluffy, then draped a blanket over the whole top level, and sprinkled with cat nip. This set up will also work for any climbing animal, or puppies and small dogs (though be careful how high you make it with a puppy, keep in mind that they tend to weigh more than cats and other small animals) This is a spot separate from the eating area that they can lay, or jump, or climb and watch the going ons in the rest of the room. Being surrounded by three walls makes them feel secure, its a great place to 'lord' over any other animals or humans in the house!


                                                    RIBBONTOPIA AND THE RESTOOMS


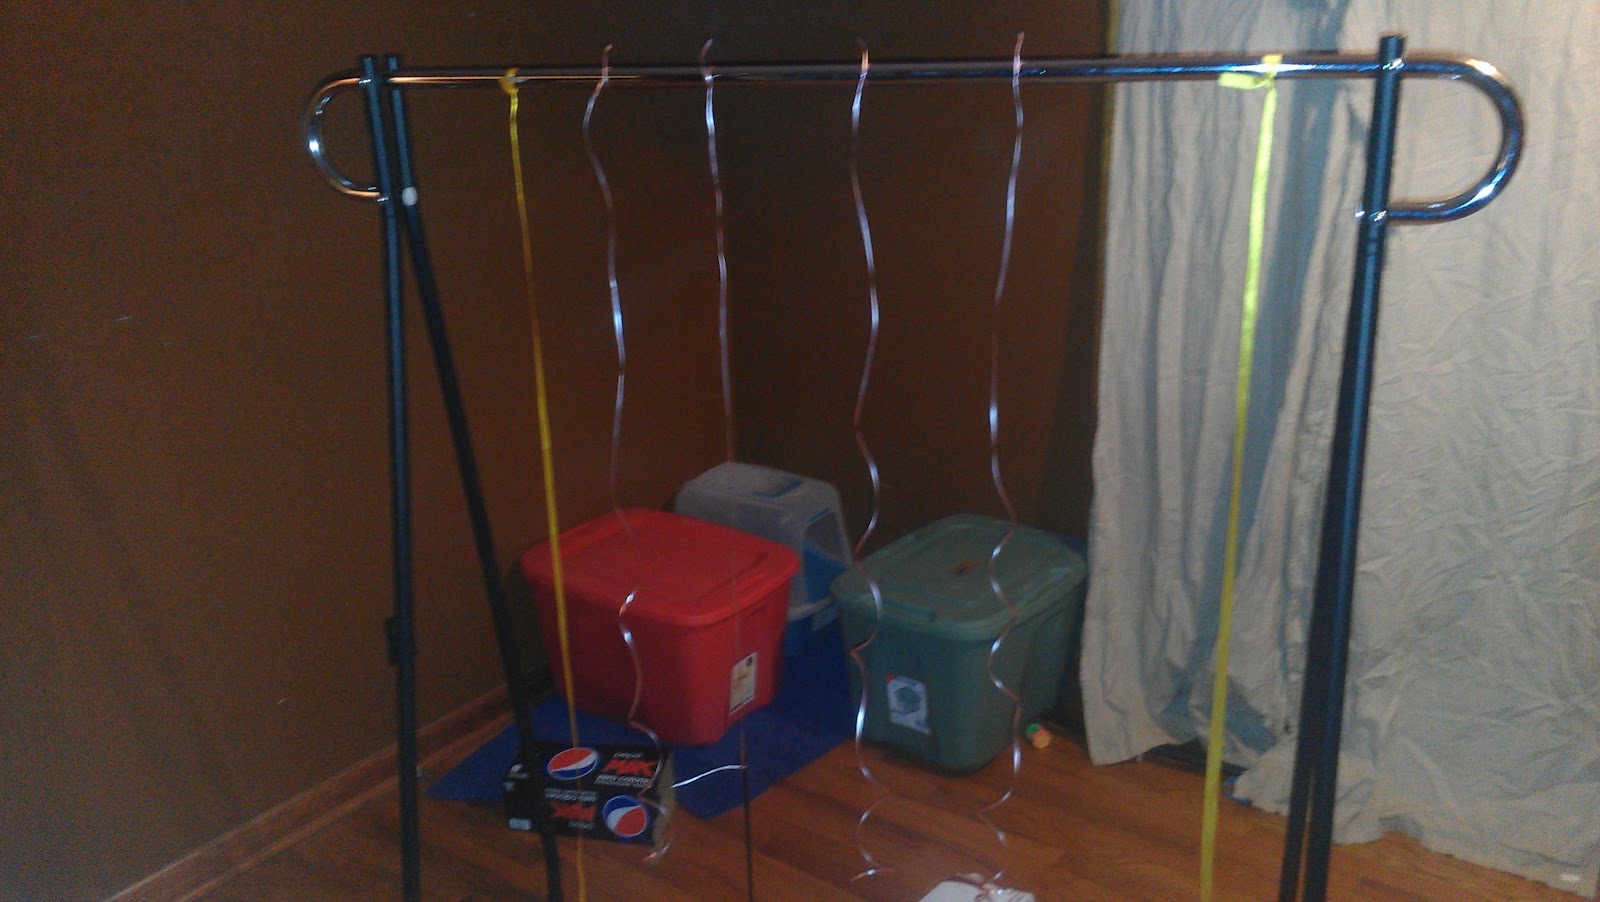
I put a potty area in the room to help entice them into using it. Since cats are kind of finicky about eating in a room with their litter box, I 'walled' it in, leaving enough room in the front for them to comfortable get in and out. So far, they seem fine with this arrangement. This is only useful if your animal uses the restroom inside, though if you have a pet that goes outdoors, perhaps doing this in a utility room with a pet door that goes outside would be wonderful, though Im sure most of us arent that lucky. I also took a cloths rack and dangled ribbons down from it, and tied toys to the end of some of the ribbons. Some animals might chew through the ribbons, but may enjoy instead strips of old bedsheets dangling that they can run in and out of and play 'jungle'. Like the feeding area, this area needs no extra enticements to get them to play, though tying a conch to one ribbon and making them work for a treat would be fun. Another touch I added in this room was a pair of old, floor length curtains I found in the garage. OJ keeps playing in my nice ones, so I hung these back there for him. I nailed them into the windowsill, because I felt that was more sturdy than a curtain rod if he was hanging on them. My hopes are that over time, he will realize he gets scolded for playing in the ones in the front room, but he does not if he plays with 'his'. You can buy curtains for a couple bucks at a goodwill, and most animals like curtains that they can play in and hide behind. I sprinkled these in cat nip to make his more enticing than mine. The last thing I did was put all their toys in the floor, and soda boxes with the ends cut off for them to run in and out of, and nailed a low wooden board across the bottom of the door to keep the toys in the room.


An unexpected side effect is this created a space to help with the bonding process between my two cats. I can feed them on opposite sides of the mountain, so they are eating together, but not 'together'. Ophelia can sit on the observation tower and observe the new intruder from a safe distance, or hide in the cave and watch unseen. There is plenty for OJ to do to keep him distracted from bugging Ophelia. In the space of only a few hours, Ophelia has stopped growling at the mere sound of OJ's voice, and will even let him bump noses with her briefly before she remembers to hiss. I think part of it is its an area neutral to me, so there is no power struggle for me in that room, and part of it is I built the playroom only a few days after getting OJ, so while the rest of the house is still 'Ophelias',  the 'structures' and most of the toys belonged to no one, which made it even more neutral ground. It was even a brand new spot for the litter box and food. So if you are planning on getting a new animal, it might be a good idea to designate a spot to do it, but dont build it until you have introduced the animals. I wouldnt recommend introducing them in the spot though, it may leave negative feelings for the spot in one or more of your animals, like if you have a bad experience the first time visiting a new spot and never really like it after.

Tips for doing this in small living spaces: A lot of us barely have enough room for the people in our houses, and the animals end up living on top of us. We would like to give our animals a place to call their own, but just dont have the room. Well, theres a couple things you can do. Do you have a dining room table that doesnt get used? Or only used when company comes over? I know a lot of people that moved into apartments with dining rooms that got tables that ended up being used as laundry holders. lol. Drape tablecloths or bedsheets over the top so that all sides are fully covered, with slack. (You might need more than one, get creative with it, and make sure it compliments the rest of the room. If this is all you are doing you may be able to spend the money on new, they can be bought for about 20 a pop for nice looking ones on sites such as ebay or amazon, and discount stores. If you must use second hand or what you have around the house, just try to get solid, neutral colors.) Tie them securely around the bottom of the table legs, making sure the fabric is taunt. If  you have to use more than one, you will need to sew or glue (fabric or hot glue) the pieces together. Cut a slit in the cloth on the side you want the entrance, make sure you dont cut all the way through the bottom, the bottom holds the cloth together, giving it a 'cave entrance', like in the cat cave pic above. Make sure the slit is big enough for you to get in and out of for cleaning and feeding. Place bedding, food and water bowls, and maybe a few toys if there is enough room for play, and you have created a little 'retreat' for them! You can do this with an end table or a coffee table for a cat or small dog too. If you dont have that, make a closet accessible for your animal with boxes to climb on and blankets for snuggling, or even a corner of the room, with a larger box stacked under a smaller box and a bed sheet over the top for a place to climb and jump on.  Cats and dogs have good imaginations, you just have to give them something to use it on, like a 'cave' or 'jungle of cloth strips' or a 'mountain'.


Thursday, September 20, 2012

Deep Fried Crab Alfredo

Ok. Seriously. You can deep fry ANYTHING and make it delish! I have had deep fried cheesecake, candy bars, Oreo cookies, various veggies, the skys the limit! One day I was feeling experimental, and came up with a fabulous recipe thats guaranteed to be a hit the next time you and your friends get together, for less than ten bucks! The only problem is is I dont really measure things for certain recipes, such as this one, eyeballing it is enough. So I will try to be as descriptive as possible, though this is a really easy one!

You will need:
One Pack Imitation Crab (I use fake cuz Im allergic to the real thing, but you can def use a can of real crab here. Be warned, you want to buy the most expensive in this case, the cheaper ones have shell bits, learned that the hard way years ago before I developed this unfortunate allergy).
Can of store bought croissant dough
For the Alfredo Sauce:
Heavy cream (the smallest container, its a half pint where I live, you dont need much)
Parm or Romano (or both!) cheese
Salt
Pepper (white is best, but if you dont have it or cant find it, dont worry bout it)
Garlic
Onion Powder
ALTERNATE: You can also just use pre made jarred alfredo, sold next to the spaghetti sauce, but I dont like the taste of the pre made stuff. If you do use it all you need is the crab meat, croissant dough, and a jar of alfredo sauce.

Preheat fryer to 300 F. Chop your crab up chunky, if your using legs chop four, if your using already chunked meat use half the package and chop it up a little more than it already is, if using canned, just drain it and dump it in the bowl.
Beat your heavy cream for a couple minutes on high. Not till its whipped, but till it thickens just a bit.
Add cheese, I used about half a cup, then pour in cream until the mixture is wet, still moldable but very wet. Add seasonings. A good rule of thumb to go by is to cover the top of the mixture with a very thin layer of salt, and a slightly thicker layer of garlic, onion and pepper. Go light, stir it up, give it a taste, if you need more, add more.
Open dough and roll it out, separating the triangles. Place a small ball of your crab mixture, about an inch and a half big, in the middle of the top (widest part) of one triangle. Pull the skinny end of the triangle up and over the ball and wrap it around, sealing the dough closed with your fingers. Pull the edges up and seal them with your fingers as well, until you have the entire ball enclosed in dough. Look around your alfredo ball, and make sure there are no openings where the alfredo can leak out, and set it to the side. Repeat with the remaining mixture/dough. Drop them into the fryer, leave plenty of room for them to float around, I have a small deep fryer and can only do about two at a time. Cook for 6-8 mins. The outside will be a nice dark golden brown, but not burnt. Cool, and serve! When you deep fry the croissant dough, all the layers separate and fry into real thin, flaky, buttery layers! It taste just like fillo dough! The inside is incredible, creamy and cheesy, and crabby. You can also add seasoned bread crumbs to the filling to make it thicker and more sturdy if you dont want to make the cheese the main thickener.

The finished product! Absolutely amazing!

Thursday, September 13, 2012

Just hangin around

Paintings are expensive! Not just paintings, but pictures that are little more than framed pictures are friggin expensive! Heck, a frame alone is ridiculously expensive! That was something that had shocked me when I moved out of my Moms. My bedroom there was covered in posters, and drawings and notes from my friends, and a couple of large pictures that she had bought me for various gift giving occasions. So when I moved out, I had exactly 2 pics, well, 5 if you count the three tiny ones that surrounded one. I def did not have money to purchase anything. So I had patience, and I shopped at garage sales and thrift stores. My first score was a large, 4ftx3ft, Edvard Munch repo, it was actually an ad for an exhibit of his paintings. I got it for $5 at a goodwill. Then I found a fabulous french champagne ad, and two small mermaid paintings that look wonderful in my bathroom. I found some that I hated the frame, but the pic was wonderful, and as long as the frame is wooden or metal it could be painted. Rather than spend money on a frame, and sometimes on the really cheap ones you cant get the back off the frame to get to the pic anyways, its all one piece, I would go to a craft store and buy a small bottle of paint for just a few dollars. You can do primary colors, but for about $5 you can get metallics that look like metal, they dont look like paint at all, you can also get paint that looks realistically like nice wood as long as the grain can still be made out under the original paint (though sanding is always an option). Place a strip of masking tape on the glass at the edge of the frame, so you dont get paint on the glass, and apply your first coat to the frame. Most of the time you can get away with no sanding, but if its a glossy frame, you may need to lightly sand it first to give the paint something to stick to. Voila! You can make a frame that doesnt match or is outdated look new!
Another thing you can do with a painting that you no longer like the pic, is cover the pic. You need another print small enough to fit in the frame, use hot glue to attach, then take a 6' spool of tulle in the color of your choice (which can be bought a craft stores like hobby lobby for about $3, the spool is 6' wide and anywhere from 10 to 20 feet long) and measure it out against the pic, making the piece long enough to wrap the full circumference of the picture, plus about two feet. Find the center of your piece of tulle, and twist it tightly into a rope. Place a small dab of hot glue at the bottom right corner of the picture, and place the center of the twist there, holding it for a second till the glue drys. Slowly twist the remaining tulle and hot glue it down along the edge of the painting. The glue will hold the twist and prevent it from unraveling, but be careful as you twist your rope, the glue cools, drys, and bonds almost immediatly, but you can pull the glued tulle rope up if you tug to hard. Its kind of tricky at first figuring out the fingering, but (Im right handed) if you hold the glued twist down with your left thumb and grasp the tulle tightly in your right hand, tugging it firmly, but not pulling TOO hard, and twist it tightly, you can release your left hand and use it to hold the end of the twist while you glue a line with your right hand, then switch hands again (holding the twisted end tight with your right hand now) and lay the twisted tulle along the hot glue with your left hand, pressing down slightly. It sounds complicated, but its easy to pick up and the rhythm is soothing. It also only a suggestion, you may have a much easier way :D Follow this pattern around two edges, then repeat on the other side, so you end up with both loose ends meeting at the top left corner. Tie these ends into a bow of appropriate size for your picture, and trim the ends. You end up with a really cool 3d effect! Below is a pic of one I did on top of a cream colored kitchen painting that was no longer relevant for my kitchen. I painted it with a fake metal paint, and antique bronze color, and put a canvas painting I got about 25 bucks at an auction right over top of the original pic! (I took the glass out. If its not removable, and youre serious, take it out back and break the glass out, going carefully around the edges in thigh gloves with a cloth to pull out an leftover pieces). (A flat print works as well, but a canvas painting is really cool if you can find one!).
                              My reworked painting! Its one of the most visually interesting items on my walls!
                                    Close up of the tulle, thats a 6' wide piece, twisted tightly into a small roll.
                                           My very first awesome find. I only paid $5 for this and its wood!

With a little creativity, you can have some pretty cool, one of a kind stuff just hangin around your house!
If you find you must buy a frame, like I did in this case (I found a poster I loved for $10, but it didnt come with a frame), get on ebay. I got this wooden one for $18, shipping included, which is close to what you will pay for a cheap plastic one in a store. The sconces I actually inherited from my Great Grandmother when she passed away, but I have seen similar in thrift shops and antique stores for between $5 and $20. I bought some dollar store fake flowers and vines, and a few feathers, I mean, look at them, tell me those ladies were not meant for a few feathers in their hair, and added some very me appropriate flair to my house.

Poor girls casserole/mac and cheese

Me and one of my best friends were hungry one night. We lived together, neither one of us had a car, and we didnt have the money for pizza. To make matters worse, I admit, we were high. Lol. We had just bought a new movie, we had a new video game, and we wanted dinner. We wanted a real dinner, not noodles or a banquet meal. So I raided the kitchen, and took stock. Of course, we had nothing. We had a piece of two diff kinds of cheese each (no meat or bread), some canned veggies, a can of tuna(no mayo), some noodles,(no sauce), u know, the usual for broke people. I ended up making a tuna casserole that was so good we memorized how I did it and made it from then on out as a planned meal! The casserole has been made a million different ways, (from the original can of corn and can of tuna to frozen brocc and canned chkn), usually from what is in the freezer and pantry, and everyone almost always has these ingredients in their pantry, or bought for just a few dollars. Thats what made me name this the poor girls casserole! (Though plain, it makes an amazing mac and cheese as well)!This casserole is extra awesome because it makes a lot, its very filling and satisfying, and you can go to the grocery and buy the ingredients for under $5. Im going to give you the recipe for the body, there are only a few non negotiable ingredients, and give you suggestions for add ins, but thats completely up to whats in your pantry right now! I dont have any pics at the moment, Im adding in this recipe just because its one I love, Ill post pics the next time I make it!
Ok, to make this casserole, you need first a box of mac and cheese. Get the water boiling. While waiting, fill a bowl (if your measuring cup is microwave proof, you can do this all in the one cup) with two cups of milk. I suggest canned evaporated milk, I always try to keep some around, you can get it at places like Big Lots for about .50 a can, and chain stores for a little more, and when you mix it half/half with water you get about four cups of milk to cook with, which is much more economical than drinking milk, and you can even stretch it out a little more if you dont buy the reduced fat. But you can use powdered milk, or whatevers in your fridge. Pour the packet of cheese powder into the milk. Tear one package of cream cheese into chunks, put into the milk. If you have any other cheese in your fridge, tear it up and put it in the cup. Seriously. Any cheese. American. Swiss. Cheddar. Havarti. Bleu. Feta. Goat. Whatever you have that is cheese, including cream (its wonderful with cream cheese added!). Microwave for about 1:30, then stir it well. Keep an eye on it while its cooking, if it starts bubbling before the 1:30 is up, take it out and stir it then. Put back in for another :45, stir. Keep microwaving in spurts, stirring very well in between until all the cheese is melted. Add salt and pepper to taste. Stir. When the noodles are done, drain and pour into a greased casserole dish. Check cheese sauce, make sure its not hot, then test it with your finger. If you can put it in there with no discomfort, add an egg. If not, keep stirring till its cool to the touch (or you will cook the egg when you drop it in). Stir the egg in, and pour over the noodles. There you go! Done! Mix in your add ins, and if you want, add a crunchy topping. (Bread crumbs, chips, saltines, ritz crackers, whatever you have. Potato chips and Doritos are delish on top too!) Bake at 350 for about an hour, or until it sets up and is no longer liquid, and golden and bubbly on top. 
Add In Suggestions: Canned corn (or any canned veggie, mixed, canned potatoes, whatever you have on hand), canned meat (tuna, chicken, ham, skys the limit!), frozen veggies, hamburger, leftover fried chicken, chicken nuggets (cut into pieces), deli meat, cut up hot dogs, eggs (boiled, scrambled, whatever) whatever else you have that would be delish with cheese added!
P.S Its a great one to bust out when you dont have a lot of money but want to impress a guy with your cooking skills! This sets up so nicely it seems professional, and when you talk about making the cheese sauce, you dont have to mention you microwaved it! Serve it with canned croissants and dessert and you your man will worship you. Lol.

How this is starting. Great American Cookie Co cheesecake brownies. Oh yes. It is.

This all started with a craving for Cheesecake Brownies from the Great American Cookie Company. I love those things. Seriously, love them. And I really wanted one. Badly. But I just cant afford to pay $5 for a brownie. One, small brownie. So I started looking for a recipe online. Surely, someone, somewhere, had this same craving as I had and had already duplicated the recipe. Alas, nada. Not one. A couple of people were asking for one, but no recipes. I was disappointed, but not deterred. I started breaking the flavors down by memory, in my head. I knew how to make the crust, due to a teenage job at said cookie company, so I pondered on the filling. I was honestly stumped and surfing around looking for a recipe while I thought on it, and came across a great blog, Amanda and Kevin (which you should check out, she has some great recipes in it). In her blog she is talking about her chess squares recipe, and commented that the flavor reminded her of the very cheesecake brownies I was so set on, and it got me thinking. I am familiar with chess squares, my grandmother has been making them since I was a kid, and the flavor was similar, and the right color as well. Of course, the texture was all wrong, so then I had to figure out how to make an ooey gooey dessert stiffer and more brownie like in texture. After much thought and deliberation, I decided that separating the eggs and whipping the whites, as well as adding in some flour, would give me at least a starting point. Imagine my surprise when I hit the nail on the head first try! I wanted to put this recipe out there, and began thinking about starting a blog. It was originally going to be about recipes I have created, or will create. I have a whole bunch of super cheap, super easy meals that are delish leftover from my college days, recipes that needed to be foolproof due to a lack of sobriety while cooking most of them, and needed to be as thrifty as possible due to a lack of funds. But my years of being flat broke, combined with being raised by an incredibly thrifty, crafty woman, has made me very creative in other areas of life as well. You see, I love being fabulous. My role models, from Lucille ball to Marilyn Monroe to your average 50's housewife did everything with style, and did it well.  Unfortunately, fabulous is not cheap, unless of course, youre me and you figure out how to do it cheaper than most people achieve average. The thing is though, Im not stingy with the advice. I love to share my knowledge and tips and tricks, my cute ideas and money saving ideas. So I decided to make this an all encompassing blog, and just fill it with every thing I do to make my life richer. This includes tips on how to achieve a fabulous mindset, because fabulous (wonderful, amazing, inspiring, role model, whatever you wanna call it) is as much as state of mind as being a jedi. Here follows a recipe for a dessert that taste amazingly like the cheesecake brownies from Great American Cookie Company, and Ill follow up with more recipes, and whatever else I feel the need to share. Enjoy!
Ingredients: 2 cups of stale chocolate chip cookies, crumbled very fine,(you can do this with a food processor, but I did it by hand. If they are stale, they crumble right up and its pretty good therapy. lol) half stick of butter, melted, two eggs separated, 4 1/2 cups powdered sugar (a little over 1lb), 8oz cream cheese softened, 1 cup flour, 1 cup white chocolate chips or chunks (chunks taste better, but the chips are optional, I didnt have any at the time I was making these and left them out and its delish this way, but you need the chips for it to taste the most like the cheesecake brownies. Without the chips I put it into muffin tins and call it baked cream cheese frosting. Also, please keep in mind that the one cup is a minimum suggestion, go crazy!)
Instructions: Preheat oven to 350. Mix the cookie crumbs and butter till the crumbs are thoroughly saturated. Press into the bottom of a greased brownie pan (or muffin tins). You can use more or less crumbs to your own liking, the thicker the crust the better. Meanwhile, cream the egg yolks and cream cheese, and slowly add flour and powder sugar. Beat the egg whites with a mixer till they reach the soft peak stage (they will be very firm and if you lift the beater up, the egg whites will follow the beater and when they cant stretch anymore, will form a peak that flops at the very tip, like a peep.) Fold the egg whites and the choc chips into the batter. Pour over the cookie crumb crust. Bake at 350, for roughly 45 mins. The brownies will have baked straight up over the top and started cracking on the top, much like a cheesecake/souffle, and will appear slightly moist and white, though brown on the edges. Knife inserted will NOT come out clean, this is something your gonna have to eyeball. When the edges start to brown and the aroma becomes amazing, they are done. Let them cool, they will fall back down as they cool, and then serve! Like I said, this time I didnt have and chips, so I made individual muffins and am calling them baked cream cheese frosting, I took a quick picture so you can see one broke open, but its missing its chips, just an fyi!
                                                                             YUM